Building a ramp seems easy—measure the span, cut some lumber, set the slope, done. But as soon as you start digging (literally), you discover that safe wheelchair access involves much more than wood and screws. As a weekend builder, you’re hands-on, budget-minded, and determined to help family or friends move freely. This friendly —but cautionary— guide outlines common errors and shows you how to dodge them before a small oversight turns into a costly rebuild.
By the time you finish, you’ll have the confidence to create a ramp that meets ADA compliance without blowing your Saturday schedule. Read more on this page to know more.
Skipping Soil Tests
Your ramp is only as strong as the ground it sits on, yet many DIYers pour posts straight into whatever dirt they find. Unfortunately, loose fill or expansive clay can shift under load and send your structure leaning like a tired fence.
- Grab a hand auger and pull a core sample to see whether you have sand, loam, or clay beneath the sod.
- Call your county extension office for soil-bearing data if you’re unsure how to read the sample.
- Add a six-inch gravel bed under each footing when the soil contains a lot of fines so water drains away instead of turning the pier into a mud plug.
- Verify frost-line depth in local codes; a shallow pier can heave even in regions with mild winters.
- Document the soil type in case inspectors—or future buyers—ask for proof of footing design.
Once your test holes are done, write down moisture levels and any rock layers you meet. These notes guide your drilling depth and help you predict how the soil will behave over time. Spending an hour on simple tests now saves years of future worry.
Are Your Footings Deep Enough?
Post holes that stop at shovel depth feel quick and efficient, but they ignore seasonal changes. Freeze–thaw cycles push shallow piers upward, leaving gaps between joists and beams that rattle every time a wheelchair rolls by. Dig to—or below—the frost line, bell the base wider than the column, and pour concrete with rebar for added strength.
If you live in a seismic zone, rely on anchors approved by a mobility-ramp contractor who knows the specialty hardware required. In back-country builds—say, a handicamp ramp installation lebanon tucked beside a creek—deeper footings are non-negotiable. Moist soils around hollows can undermine short posts faster than you’d think, and a rebuild in damp weather is no fun. Adding an extra twelve inches of depth today can buy you decades of worry-free service.
Ignoring Drainage Needs
Water is the silent killer of ramps. When runoff pools along the edges or beneath stringers, wood rots, metal rusts, and algae turns everything slick green. Plan the site so rain moves away from the ramp—think swales, French drains, or a simple crushed-stone trench. Pitch the deck a slight 1–2 percent transverse grade so puddles can’t linger, and leave at least two inches of airflow below joists even when you’re using composite decking. Before you set that first board, stand back, picture a thunderstorm, and trace the water’s path in your mind.
In Middle Tennessee, sudden cloudbursts demand extra side drains; in the desert Southwest, a single flash flood can wash away poorly anchored footings. Wherever you live, set up drainage before you pour concrete—retrofitting after a problem appears is messy, expensive, and rarely as effective as doing it right from the start.
Using Slippery Surfaces
A gentle slope (https://dictionary.cambridge.org/us/example/english/gentle-slope) won’t help if wheels lose traction. Smooth plywood, glossy paint, and polished metal can turn into ice rinks after dew or frost. Protect every user—walker, stroller, or chair—by choosing a finish that grips as conditions change.
- Choose textured composite or grooved planks that shed water quickly.
- Add a factory-coated non-slip surface on high-traffic zones like landings and turns.
- Blend fine sand into porch paint if the budget forces plywood decking, and recoat yearly.
- Follow ramp-slope guidelines closely; steeper runs need rest platforms every 30 feet so users—and pushers—can stop safely.
- Attach drainage mats beneath aluminum sheets to prevent condensation from forming slick films in humid climates.
For homes in snow country, keep a stiff shop broom nearby to sweep away powder before it compacts. In warmer coastal towns, rinse salt residue often so corrosion doesn’t strip the grit from your deck. A little traction planning now prevents a painful insurance claim later.
Neglecting Edge Protection
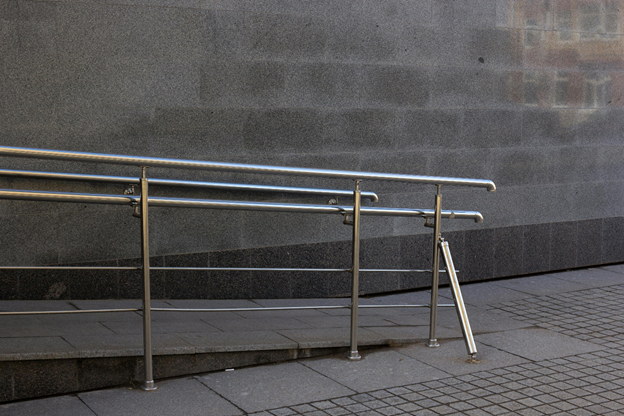
Picture a visitor with limited sight rolling too close to the side: no toe board, no wheel guard, and a sudden drop just waiting to snag a caster. Edge protection isn’t just a handrail; it includes curbs, wheel guards, and mid-rails that keep feet, canes, and walkers on the deck. Lumber scraps make quick curbs, but aluminum guard flanges last longer and resist rot. Mount them flush so snow shovels don’t catch and double-check that handrail returns curve into the post—no loose sleeves or medical tubing should snag.
During disability ramp installation, I often see gorgeous railings ruined by cheap fasteners that rust out in a year. Spend a dollar more per screw and save yourself a weekend of repairs. The small hardware choices matter just as much as the big beams.
Wrapping Up
Building an accessibility ramp is one of the most satisfying weekend projects you can tackle. Run soil tests, dig robust footings, guide water away, pick grippy surfaces, and finish strong with solid edge protection. By weaving these good habits into your natural DIY spirit, you’ll create a structure that looks professional and feels safe for years to come. Every guest—rolling, walking, or strolling—will notice the care you put into their journey. Measure twice, cut once, and enjoy the triumphant roll up a ramp that truly serves its purpose.
Set a reminder each season to tighten bolts, sweep off debris, and refresh non-skid finishes where foot traffic has worn them smooth. A simple 30-minute maintenance check can ward off costly repairs and extend the life of your handiwork. Share your build notes with neighbors—accessibility is contagious, and one well-built ramp often inspires an entire block to improve mobility.


